ASSEMBLY INSTRUCTIONS
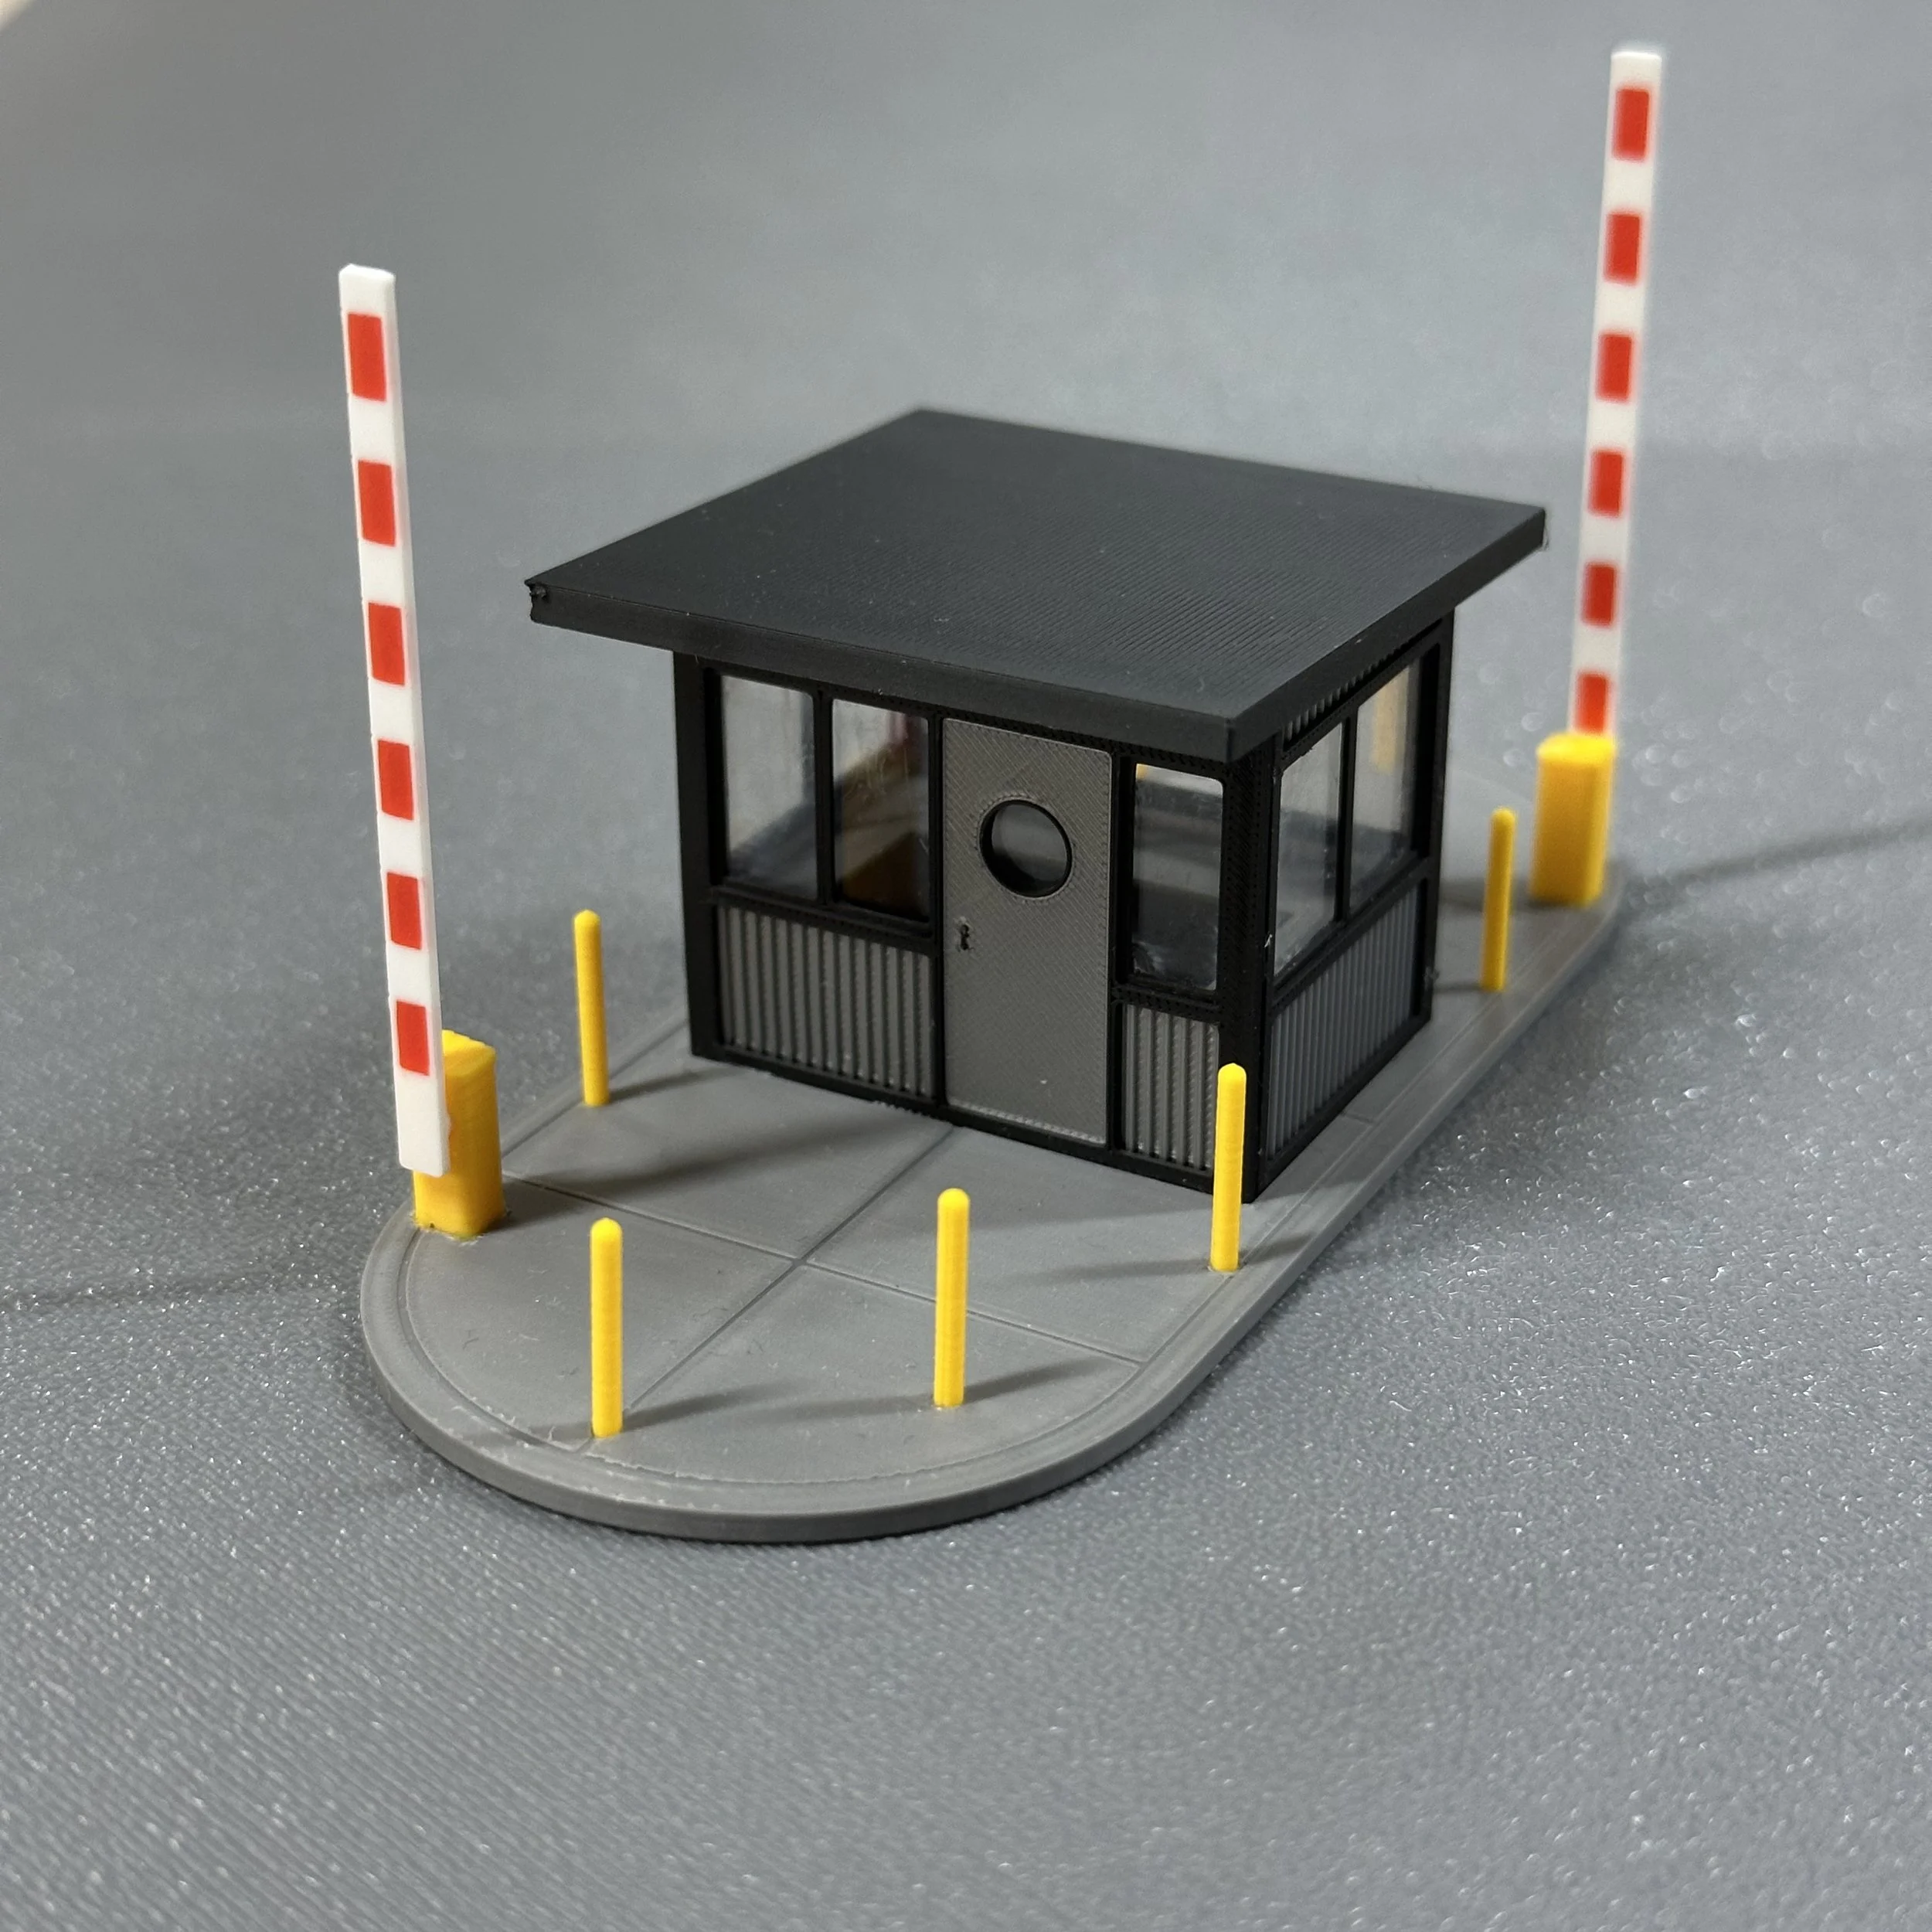
RoadScapes HO Building – Secure Facility Entrance – Industrial Gate
Please review all steps before beginning assembly.
Parts Included
Oval concrete platform
4 building walls
1 front wall with door
1 back wall
2 side walls
4 window frame inserts
2 wide frames
2 narrow frames
Interior U-shaped table
Roof
8 yellow bollards
2 security gate pedestals
2 red and white security gates
Before You Begin
The model is designed to dry-fit cleanly so you can test placement and orientation.
Window frames require adhesive and should be installed before wall assembly.
For long-term use, it is recommended to glue the walls together and to the platform.
Leaving the roof unglued allows interior details to be changed later.
Step-by-Step Assembly
Step 1 – Test Fit
Test fit the platform, walls, and roof without glue to understand orientation and placement. The walls and platform can be dry-fit at this stage. Window frames should not be test fit and will require adhesive.
Step 2 – Install Bollards
Gently pull off the thin support brim that extends from the bottom of each bollard.
The top of each bollard is rounded and the bottom is flat.
Install the bollards with the flat side pressed into the platform holes. Press straight down while gently rotating for a snug fit. Adhesive is optional.
Step 3 – Install Window Frames
Glue the window frames to the inside of the walls:
Wide window frames install on the wide walls
Narrow window frames install on the side walls
Check orientation before gluing and allow adhesive to fully cure before proceeding.
Step 4 – Assemble Building Walls
Apply a small amount of adhesive to the wall tabs, vertical edges, and bottom edges.
Seat the walls into the platform, with the wide walls bookending the narrower side walls.
Gently align the walls and hold in place until the adhesive begins to set.
Step 5 – Install Interior Details
Place the interior U-shaped table and any additional scene details inside the building before installing the roof.
Step 6 – Roof Installation
Install the roof with the higher roofline facing the front door.
It is recommended to glue the walls together and to the platform while leaving the roof removable. This allows interior figures or desk details to be added or changed later.
Step 7 – Security Gate Assembly
Install the gate pedestals with the gate openings facing away from the building.
Glue the pedestals into the platform.
Insert the red and white security gates into the pedestals. The gates are designed to remain movable between upright and lowered positions.
Notes & Tips (Short, Practical)
Notes
Use hobby-grade adhesive suitable for plastic (PLA).
Gates are intended for scene positioning and are not toys.
Additional fencing or perimeter details are not included and may be added to suit your layout.